Home> Company News> How Long Does it Take to Build a Martin Guitar Kit? A Realistic Timeline and Expectations
- AddressShan Dong Province Weifang City
- Factory AddressShan Dong Province Weifang City
- Phone(Working Time)86-13305315989
- Phone(Nonworking Time)86-13305315989
How Long Does it Take to Build a Martin Guitar Kit? A Realistic Timeline and Expectations
2023-05-05 10:43:04Building a guitar from scratch can be a rewarding experience for musicians and hobbyists alike. However, it can also be a daunting task, especially for those who have never attempted it before. In this article, we will provide a comprehensive guide on building a Martin guitar kit, one of the most popular and revered acoustic guitar brands in the world.
We will start by discussing the different types of Martin guitar kits available and how to choose the right one based on your skill level, budget, and desired features. We will also outline the necessary steps to prepare for building the kit, such as acquiring the necessary tools and materials, setting up a workspace, and familiarizing oneself with the instructions.
Next, we will provide a realistic timeline for building a Martin guitar kit, from start to finish, as well as an overview of the different stages involved in the build process. This will include gluing the top and back, installing the bracing, shaping the neck, and finishing the guitar.
Of course, building a guitar is not without its challenges. In section 5, we will discuss common challenges that builders may encounter while building a Martin guitar kit, such as glue and finish problems, alignment issues, and fretting difficulties. We will provide solutions to these challenges and tips for avoiding them.
In section 6, we will describe the finishing and setup process for a Martin guitar kit, including sanding, staining, and applying a finish. We will also discuss the importance of proper setup for achieving optimal playability and sound.
Finally, we will outline the process of testing and fine-tuning a Martin guitar kit to ensure optimal sound and playability in section 7. This will include common adjustments that may need to be made, such as truss rod adjustments, string height adjustments, and intonation adjustments.
By the end of this article, readers will have a comprehensive understanding of what it takes to build a Martin guitar kit and how to overcome common challenges along the way. We hope to provide readers with the confidence and knowledge they need to embark on this rewarding journey and create their own beautiful and unique Martin guitar.
Choosing a Martin Guitar Kit
Before you start building a Martin guitar kit, it's essential to choose the right one based on your skill level, budget, and desired features. Martin offers a range of guitar kits for both acoustic and electric guitars, including dreadnoughts, 000s, OM and OOO models, as well as limited-edition models.
When it comes to selecting a Martin guitar kit, the first factor to consider is your skill level. If you are a beginner, it's best to start with a simple kit that doesn't require advanced woodworking skills. Martin offers several guitar kits that are designed for beginners, such as the D-1 Dreadnought and the 000-15SM Acoustic Guitar Kit.
For more experienced builders, Martin offers guitar kits that are more challenging, such as the 000-28EC Eric Clapton Signature Acoustic Guitar Kit, which features advanced bracing patterns and intricate inlay work. It's essential to choose a guitar kit that matches your skill level to avoid frustration and ensure a successful build.
Another important factor to consider is your budget. Martin guitar kits range in price from a few hundred dollars to several thousand dollars, depending on the model and features. It's essential to have a clear idea of your budget before you start shopping for a kit to avoid overspending.
When selecting a Martin guitar kit, it's also important to consider the desired features. Different kits come with different tonewoods, finishes, and hardware options. For example, some kits feature a Sitka spruce top, while others feature a mahogany top. Some kits also come with pre-installed pickups for electric guitars.
It's essential to research different Martin guitar kits and their features to ensure you select a kit that meets your needs and preferences. Reading reviews and watching videos of the kits being built can be helpful in making an informed decision.
In summary, choosing the right Martin guitar kit is essential to ensure a successful build. Consider your skill level, budget, and desired features when selecting a kit, and take the time to research and compare different options. With the right kit, you can embark on a rewarding journey of building your own Martin guitar.
Preparing for the Build
Preparing for building a Martin guitar kit is a crucial step in ensuring a successful build. Proper preparation can help you avoid mistakes and make the process smoother and more enjoyable. Here are the necessary steps to prepare for building a Martin guitar kit:
-
Acquire the necessary tools and materials: Building a guitar kit requires specific tools and materials, such as clamps, chisels, sandpaper, glue, and finishing supplies. Martin guitar kits usually come with the necessary materials, but you'll need to purchase or borrow the required tools. It's essential to have high-quality tools to ensure accuracy and avoid damaging the wood or components.
-
Set up a workspace: Creating a dedicated workspace for building the guitar kit is essential. It should be a clean, dry, and well-lit area with enough room to move around and store your tools and materials. It's also important to have a workbench or table at the right height to avoid back and neck strain.
-
Familiarize yourself with the instructions: Before you start building, take the time to read and understand the instructions thoroughly. Martin guitar kit instructions are usually clear and easy to follow, but it's important to take note of the order of operations and any special instructions or tips.
-
Prepare the wood: The wood components of the guitar kit need to be properly prepared before assembly. This involves sanding the wood to the correct shape and size and ensuring that the surfaces are smooth and flat. This step is critical as it will affect the guitar's sound and playability.
-
Test fit the components: Before applying glue, it's important to dry-fit the components to ensure a proper fit. This step will help you identify any issues that need to be addressed before assembly.
By taking the time to prepare properly, you can avoid costly mistakes and ensure a successful build. Building a guitar kit can be a time-consuming and challenging process, but with the right preparation and mindset, it can also be a rewarding and enjoyable experience.
Building the Guitar Kit
Building a Martin guitar kit can be a challenging but rewarding experience. The following is a realistic timeline for building a Martin guitar kit, from start to finish:
Week 1-2: During the first week, you will be primarily working on assembling the sides of the guitar. The sides will need to be bent to the correct shape using a bending iron or other bending equipment. You will then glue the sides together and clamp them in place. Once the glue has dried, you will cut out and fit the top and back plates. During the second week, you will be gluing the top and back plates to the sides, using specialized clamps to ensure a tight fit.
Week 3-4: In week three, you will begin working on the bracing. This involves cutting and shaping the braces to the correct size and fitting them to the guitar's top and back plates. Once the bracing is fitted correctly, it will be glued in place. In the fourth week, you will shape the neck and install the fretboard, frets, and nut. This step requires precision and attention to detail to ensure the guitar's proper playability.
Week 5-6: In week five, you will attach the neck to the guitar's body and install the tuners. You will also begin the finishing process, which involves sanding the guitar's surfaces to a smooth finish. During the sixth week, you will apply the finish, which can be a time-consuming process that requires patience and care.
Week 7-8: In week seven, you will install the bridge and saddle, which are critical components that affect the guitar's tone and intonation. This step requires precision and careful measurements to ensure optimal performance. In the eighth week, you will complete the finishing process and install the strings, which will bring the guitar to life.
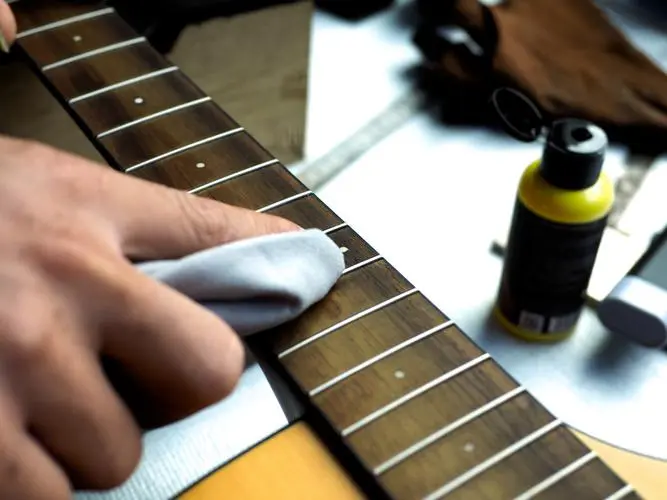
It's important to note that the timeline for building a Martin guitar kit may vary depending on the builder's skill level, available time, and working pace. Some builders may take longer to complete certain stages, while others may complete them more quickly.
In summary, building a Martin guitar kit requires patience, attention to detail, and a willingness to learn and experiment. While the process can be challenging, the end result is a beautiful and unique instrument that you can be proud of.
Common Challenges and Solutions
Building a Martin guitar kit can be a challenging process, and even experienced builders may encounter some difficulties along the way. Here are some common challenges that builders may face while building a Martin guitar kit, along with solutions and tips for avoiding them:
-
Glue and finish problems: Improper application of glue or finish can result in gaps, bubbles, or uneven surfaces. To avoid this, it's important to apply the glue or finish in thin, even layers and use a brush or cloth to spread it evenly. You should also ensure that the surface is clean and free of dust or debris before applying the glue or finish.
-
Alignment issues: The guitar's components need to be aligned correctly to ensure proper playability and sound. To avoid misalignment, it's important to take accurate measurements and use specialized tools, such as a straightedge or a laser level. It's also helpful to dry-fit the components before gluing to ensure a proper fit.
-
Fretting difficulties: Installing the frets can be a challenging process, especially for beginners. To avoid issues with frets, it's important to ensure that the fret slots are cut to the correct depth and that the frets are pressed in tightly. It's also important to use the proper tools, such as a fretting hammer or press, to install the frets.
-
Wood splitting: The wood used in guitar kits is delicate and can easily split or crack if handled improperly. To avoid this, it's important to use sharp tools and take your time when cutting or shaping the wood. You should also avoid applying too much pressure or force when clamping the components together.
-
Sound and playability issues: Even with proper assembly, the guitar may not sound or play as expected. This may be due to issues with the setup or adjustments needed to achieve optimal sound and playability. It's important to test and fine-tune the guitar regularly, making adjustments to the truss rod, string height, and intonation as needed.
By being aware of these common challenges and taking the necessary precautions, you can avoid mistakes and ensure a successful build. It's also important to remember that building a guitar is a learning process, and even experienced builders encounter difficulties. Don't be afraid to ask for help or consult online forums and resources for guidance. With patience and persistence, you can overcome any challenges and build a beautiful and unique Martin guitar.
Finishing and Setup
Finishing and setup are critical steps in building a Martin guitar kit. The finishing process involves sanding, staining, and applying a finish to the guitar's surfaces, while setup involves adjusting the guitar's components to achieve optimal playability and sound. Here's what you need to know about finishing and setup:
Finishing: The finishing process involves sanding the guitar's surfaces to a smooth finish and applying a finish to protect the wood and enhance its appearance. Martin guitar kits usually come with a nitrocellulose lacquer finish, which is known for its durability and ability to enhance the guitar's natural tone. However, other finishes, such as oil or polyurethane, may also be used.
The finishing process can be time-consuming and requires patience and attention to detail. It's important to sand the guitar's surfaces to a smooth finish before applying the finish, as any imperfections will be visible once the finish is applied. You should also follow the manufacturer's instructions for applying the finish and allow ample time for it to dry before proceeding to the next step.
Setup: The setup process involves adjusting the guitar's components to achieve optimal playability and sound. This includes adjusting the truss rod, string height, and intonation. Proper setup is critical to ensuring that the guitar plays in tune and feels comfortable to play.
To adjust the truss rod, you will need to loosen or tighten the rod using a specialized tool. This will help to straighten the neck and prevent any bowing or warping. String height, also known as action, can be adjusted by adjusting the height of the saddle or bridge. It's important to achieve a balance between low action for comfortable playing and high enough action to avoid buzzing or rattling strings.
Intonation can be adjusted by adjusting the position of the bridge or saddle to ensure that the guitar plays in tune across all frets. This step requires precision and attention to detail to ensure optimal sound and playability.
In summary, finishing and setup are critical steps in building a Martin guitar kit. The finishing process involves sanding and applying a finish to protect the wood and enhance its appearance, while setup involves adjusting the guitar's components to achieve optimal playability and sound. Proper finishing and setup can make a significant difference in the guitar's overall tone and playability.
Testing and Fine-Tuning
Once the Martin guitar kit is built and setup, it's essential to test and fine-tune the guitar to ensure optimal sound and playability. Here's what you need to know about testing and fine-tuning a Martin guitar kit:
Testing: Testing the guitar involves playing it and listening for any issues with intonation, sound, or playability. It's important to test the guitar in different playing positions and playing styles to get a comprehensive sense of its performance.
Common issues that may be detected during testing include buzzing or rattling strings, uneven sound across frets, or difficulty playing certain chords or notes. These issues may be addressed through further adjustments or fine-tuning.
Fine-tuning: Fine-tuning the guitar involves making small adjustments to the guitar's components to address any issues detected during testing. Common adjustments include:
- Adjusting the truss rod to straighten the neck and prevent bowing or warping
- Adjusting the saddle or bridge to achieve optimal string height and intonation
- Replacing the strings to improve sound and playability
It's important to make adjustments slowly and carefully, as even small adjustments can significantly affect the guitar's performance. It's also helpful to keep track of any changes made to the guitar's components to ensure consistency and avoid over-correcting issues.
It's essential to test and fine-tune the guitar regularly, as changes in temperature, humidity, or string tension can affect the guitar's performance over time. By staying attentive to the guitar's sound and playability, you can ensure that it performs at its best and continue to enjoy playing it for years to come.
In summary, testing and fine-tuning are critical steps in building a Martin guitar kit. Testing involves playing the guitar and listening for any issues with sound and playability, while fine-tuning involves making small adjustments to the guitar's components to address any issues detected during testing. By staying attentive to the guitar's performance and making necessary adjustments, you can ensure that it performs at its best and provides years of enjoyment.
Conclusion
Building a Martin guitar kit can be a challenging but rewarding experience. By following the steps outlined in this guide, you can successfully build a beautiful and unique instrument that you can be proud of.
In summary, here are the key points to keep in mind when building a Martin guitar kit:
- Choose the right kit based on your skill level, budget, and desired features.
- Prepare for the build by acquiring the necessary tools and materials, setting up a workspace, and familiarizing yourself with the instructions.
- Follow a realistic timeline for building the guitar kit, taking the necessary time and care at each stage.
- Be aware of common challenges and solutions, such as glue and finish problems, alignment issues, and fretting difficulties.
- Finish and set up the guitar carefully to achieve optimal sound and playability.
- Test and fine-tune the guitar regularly to ensure it performs at its best.

Building a guitar kit can be a challenging process, but it's also a learning experience that can help you develop new skills and deepen your appreciation for music and craftsmanship. Take your time, stay patient, and don't be afraid to ask for help or seek out resources online. With practice and persistence, you can build a beautiful and unique Martin guitar that will provide years of enjoyment.
 Eminence Naseberry Treatment Cream 60ml
 Sommerreifen Goodride SC328 Radial 225/65 R16C 112/110R 8PR BSW
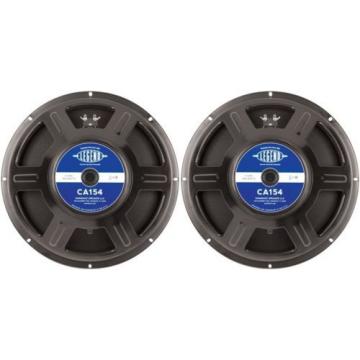 Eminence Legend CA154 Legend Series 15" 300-Watt Replac... (2-pack) Value Bundle
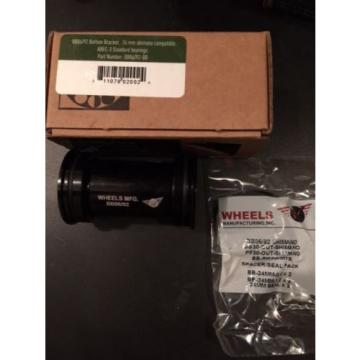 New: Qty: WHEELS MANUFACTURING PRESSFIT BB86/92 RADIAL BEARING BLACK SHIMANO
 1X 235/60/16 BRAND NEW TYRE TOYO RADIAL SUMMER M+s TASU
Top Products
| Martin HD35 |
